
Extremely Heavy Loads
Paints for Woodwork, Doors, and Windows
This is an excerpt from the Book called “For Professional Looking Interior Painting”. Continue reading to learn more about Paints for Woodwork, Doors, and Windows, thanks to the author.
Woodwork, Doors, and Windows
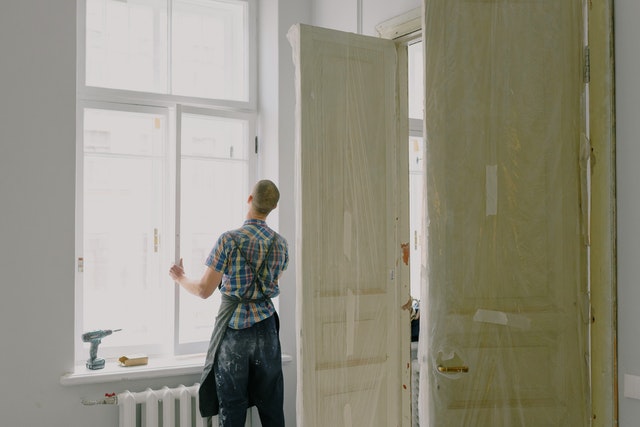
Painting a room’s woodwork and the trim around doors and windows opens up a number of design possibilities. You can choose a bold color to contrast with the color of walls and ceilings, or use the woodwork as a frame to highlight the color of the walls. If the woodwork is the most distinctive feature in the room, this is your opportunity to enhance its beauty. If the woodwork is quite ordinary, you can make it blend into the background.
Paints for woodwork
While many types of wood used in furniture making are so beautiful that their grain and natural color are left exposed, much of the woodwork found in homes relies on painted finishes for its beauty. This is especially true of most houses built within the past 40 years. However, older homes and even some newer houses in certain parts of the country have stained woodwork. If you are adding new moldings or doors to this type of house, you will want to stain the new wood to match what is already there.
Painting technique
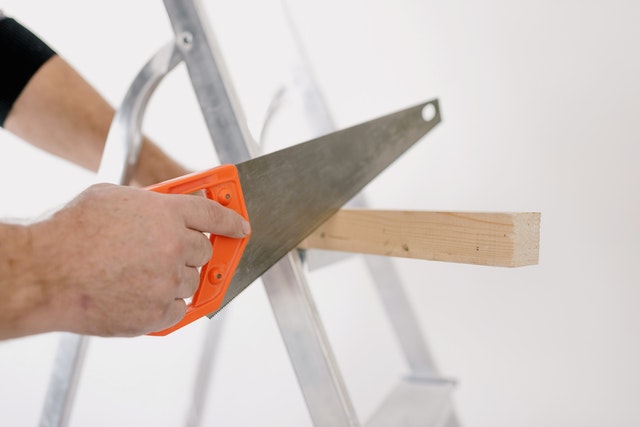
Painting the woodwork of a room requires a slightly different technique than covering the walls and ceilings does. The sweeping motions of using a roller give way to the control and precision of using a brush on a small surface. Also, brush marks are more likely to occur on wood than on plaster or drywall.
Preparing woodwork
Whether it has been painted before or not, wood must be properly prepared before being painted. In general, this means filling any cracks and holes and then sanding the surface. Even previously painted surfaces must be sanded, especially if they were painted with a glossy sheen. The sanding gives the surface “tooth,” or something to which the new paint can adhere. This is very important if the original paint is oil-based and you plan on covering it with a water-based paint. As an alternative to sanding, you could apply a chemical deglosser. Deglossers are liquids that help the new paint bond to the old one.
Be sure surfaces are clean. Remove fingerprints and stains with a household cleanser and allow to dry. Clean oily woodwork with trisodium phosphate according to label directions.
Just as you surveyed your walls and ceilings to judge the extent of necessary repairs, do the same with the woodwork. Pay special attention to the woodwork around doorways and base- boards near furniture, as these areas are subject to a lot of abuse.
Making repairs
Fill holes or nicks in woodwork with wood filler. Some professional painters use glazing compound to fill small holes. Designed to hold glass in window frames, this putty-like substance does not shrink and is easy to apply, hence its popularity among professionals. Latex caulk can be used to fill seams that open up between two pieces of molding.
Removing peeling paint
Peeling or loose paint can ruin a new paint job. Protect your paint job by carefully scraping away loose material and sanding the edges to provide a smooth transition between the sanded area and sound paint. In some cases, you will have to strip away the old paint in order to provide a good surface for the new paint.
Preparing windows and doors
The wood on windows and doors should be free of defects and dirt grease, as should any other wood surface. Before painting, remove all hardware, such as locksets and doorknobs.
Preparing Painted Wood
1. Roughen the surface
Prepare glossy sheens to receive the new paint by shading with 150-grit sandpaper. On wide sections of molding or casings, use an electric palm sander. Wipe the surface with a cloth or vacuum it. Then repair and fill any holes and nicks.
2. Fill any holes
Use a putty knife to apply wood filler or glazing compound. Smooth with the knife so that the repair is even with the surface of the wood. If the first layer of filler shrinks, apply a second layer. Allow the repair to dry, then apply primer.
3. Deal with any loose paint
Scrape away loose paint with a paint scraper. To avoid goughing the underlying wood surface, hold the blade nearly parallel to the surface. Remove as much old paint as you can. Stop when you reach an area of fully adhered paint.
4. Sand the edges
Finish the repair by sanding the edges of the old paint. This will help to create a smooth transition between the new paint and the old. Prime the repair.
Hiding Wood Knots
If wood knots are showing through the old paint finish, begin your project by spot priming with a shellac-based primer (p.24). If you skip priming, the knots will eventually bleed through.
Stripping Woodwork
It is usually unnecessary to strip the woodwork in a room unless you are planning to remove layers of old paint to reveal antique moldings or millwork. If the old paint is still in good condition, proceed as shown on pages 80-81. But if the old paint finish is flaking, peeling, or blistering, correct the problem by stripping the paint from the damaged section.
There are three ways to remove paint: using a heat gun, sanding the surface, or applying chemical paint removers. All three methods have their pluses and minuses. Heat guns make the work go quickly but if not used properly can scorch the woodwork or cause a fire. A power sander is useful for removing paint on large sections of flat woodwork. Sanding provides a smooth finish but produces a lot of dust. Chemical strippers are available as liquids, pastes, and gels. Although they provide quick results, they are caustic, and some produce noxious fumes. If you do use a chemical stripper, choose pastes or gels for vertical surfaces.
When stripping or sanding, try to close the rooms off from the rest of the house by hanging sheets of polyethylene plastic over doorways. This keeps fumes (be sure the room is well ventilated) and sanding dust from getting into passages or other rooms.
Using a Heat Gun
Strip paint with a heat gun
Heat guns cause the paint to bubble and blister. As the paint bubbles, remove it with a flat-blade knife. Keep the heat moving in front of the knife. Direct the heat gun away from the wood surface as you scrape the paint from the knife into a metal container.
Using a Power Sander
Strip paint with a power sander
First, use a coarse-grit paper in the sander. Always keep the sander moving to avoid damaging the wood surface. Sand in the direction of the grain. When all the paint is removed, smooth the wood surface by hand-sanding with a fine-grit paper.
Using Chemical Strippers
1. Apply the stripper with a brush
Wearing protective gloves, apply the chemical stripper with a brush and then wait for the time specified in the directions on the product’s label. Let the stripper do the work of dissolving the paint.
2. Remove the paint with a knife
Remove the loose paint with a flat-blade knife, disposing of the waste in a metal container. Work carefully to avoid damaging the wood. Apply a second coat of stripper if necessary.
3. Remove the paint from grooves and crevices
Use an old toothbrush to remove paint from grooves and crevices. Don’t try to remove the paint from creases with a wire brush, as it will scratch the wood.
4. Wipe and wash the surface
You may have to wipe the surface down with more stripper and steel wool before wiping it with water to remove all traces of the stripper. Follow the directions on the product’s label. Sand the surface lightly before priming.
Preparing Bare Wood
As with any surface about to be painted, bare wood must be clean, dry, and smooth. Clean with a household cleanser if necessary. For stubborn grease marks and oil-based spots, rub with a rag dampened with denatured alcohol (wear rubber gloves).
Carefully check all the moldings and casings. Spot sand rough edges and fill nail holes, cracks, and dents (p.81). Make sure that all nails are punched below the surface of the wood.
After sanding, make sure that you remove all sanding dust before it becomes trapped under a coat of primer by wiping the woodwork with a damp cloth or vacuuming thoroughly. Professional furniture refinishers use a rack cloth specially treated to remove dust. If you are painting only a window or two or a short section of new molding, invest in a tack cloth. For larger jobs, use a damp-not wet-rag or sponge to remove dust.

Filling joints
The joints where two pieces of door or window casing meet at a corner sometimes separate. Caulking materials are used as fillers for open joints. There are many different types of caulk on the market. For filling cracks in wood, choose either plain latex or acrylic latex, as both of these are compatible with wood and can be painted.
Filling nail holes
Fill nail holes in new moldings and casings with wood filler or glazing compound. Push in a small bit with the edge of a putty knife or your finger. You can use the same technique for small nicks and dents in the wood. Sand if necessary.
Smoothing rough spots
Use a fine-grit sandpaper to smooth the rough spots. Before priming, wipe the surfaces with tack cloth or a damp rag. Allow to dry and then prime.
Filling openings
Fill a separated joint in a window casing with caulk. Apply it with a caulking gun. This will seal out both air and water. After you have filled the opening, wipe the surface smooth and prime.
Sanding difficult areas of wood
Smooth narrow areas, such as muntins, by cutting the sandpaper into strips and grasping the muntin between your thumb and forefinger. Sand in an up-and-down motion (or from side to side on horizontal muntins). Wipe with a cloth before priming.
Priming and painting woodwork
The right tools
Although the walls and ceilings of a room may make up a larger area, you need just as much precision when painting the woodwork of an average-size room. For moldings and casings, you’ll be using 2-inch brushes and spending a lot of time painting straight edges along walls and ceilings. Rather than masking these areas, use a straightedge to mask as you go.
Priming the surface
Apply a coat of primer to all bare wood before painting. The primer will seal the surface of the wood, preventing the paint from soaking in, and will provide a good base for the finish coats.
If a water-based primer has slightly raised the grain of the wood, sand with a fine-grit sandpaper and remove sanding dust with a damp rag before applying finish coats. Oil-based primers can also be used, even if you plan on applying a water-based paint as a finish coat. However, oil-based primers usually cannot be painted for 24 hours after they are applied (see p.24). Mask any adjoining surfaces that will not be painted.
When to prime moldings
Some professionals like to prime moldings before they are installed. Stand the section of molding on end or place it on a work surface covered with newspaper and then paint. Since there is no need to paint a straight edge, the primer will go on quickly. However, spot priming of repairs, such as filled nail holes, is still required.
Check the drying time
Be sure to check the label on the primer can to see when you can apply the finish coats. Although the primer must have time to dry completely, it is important to apply top coats as soon as possible after drying. Primers left uncovered for too long become poor paint surfaces.
Painting woodwork
When the primer is dry, sand lightly and wipe away the dust. Rough up the surface of painted wood with a fine-grit sandpaper or liquid deglosser before painting.
Painting moldings
Work from a stepladder or scaffolding. Start wherever you are most comfortable, but remember that right-handed painters will find it easier to work from left to right.
Painting built-ins
Bookcases, cabinets, and other built-ins should receive the same preparation as other woodwork. Use a washable-sheen paint on these areas. If possible, remove shelves before painting; otherwise, follow the sequence on page 87.
Priming Wood
Apply in the direction of the grain
Brush on primer with a 2-inch-wide brush in the direction of the wood grain. Don’t be concerned if it appears to be splotchy and uneven. The finishing coats of paint will smooth out the surface.
Avoiding Masking
Masking takes a great deal of time. To avoid masking, hold a straight-edge in your free hand to protect surfaces as you paint. To paint the baseboard, hold the straightedge to protect the floor covering.
Painting Woodwork
Painting ceiling moldings
Having primed, start in the corner with a 2-inch brush. Apply in the direction of the wood grain. Brush out with a wet brush and smooth without reloading it. At a new section, apply paint and brush back toward the wet edge. Feather the edge before moving to another section.
Painting chair-rail moldings
Be sure to protect the wall on both sides of the molding. For the narrow edges along the top and bottom, switch to a small pad or artist’s brush. Paint these sections while the main part of the molding is wet. Smooth out drips before moving to another section.
Painting intricate moldings
Use a stencil brush to fill the grooves and creases of elaborate molding designs. The round shape and closely spaced bristles of a stencil brush do a good job of forcing paint into every part of the design.
Painting baseboards
As with other woodwork, paint in the direction of the grain. Protect the floor with masking tape or heavy kraft paper.
Avoiding Lap Marks
1. Feather the edge
Lap marks show up more with a glossy paint. Since most woodwork is finished with a shiny surface, it is important to feather the edge. Brush the wood surface lightly with just the tips of the bristles, lifting the bristles as you reach the edge of a newly painted area.
keep a wet edge on woodwork
Paint woodwork in small sections, keeping a wet edge to avoid lap marks. Apply new paint in a dry area and work back toward previously applied paint. Brush in the direction of the grain.
Painting Shelves
Treat each shelf as a separate section. Complete an entire section before moving on to the next.
Work Sequence
- Starting at the top shelf, paint the back wall of the bookcase.
- Next, paint the sidewalls of the section you are working on.
- Then paint the upper and lower shelf surfaces.
- Complete the other sections in the same way.
- Finally, paint the exposed horizontal and vertical edges
Staining Woodwork
Apply the stain
Wear rubber gloves and protect the floors and walls by masking. Apply with a brush or a rag in the direction of the wood grain. Work in small sections so that you can control the level of stain penetration.
Wipe off the stain
Wait as directed on the label and then wipe off with a clean rag. As the work progresses, you will develop a sense of the time between application and wiping off. This will help you achieve an even finish.